You’ve done the research. You shopped around, sat through demos, and finally found a practice management software that actually fits how your clinic works. The features line up. The workflow makes sense. The interface doesn’t fight you.
Then reality hits.
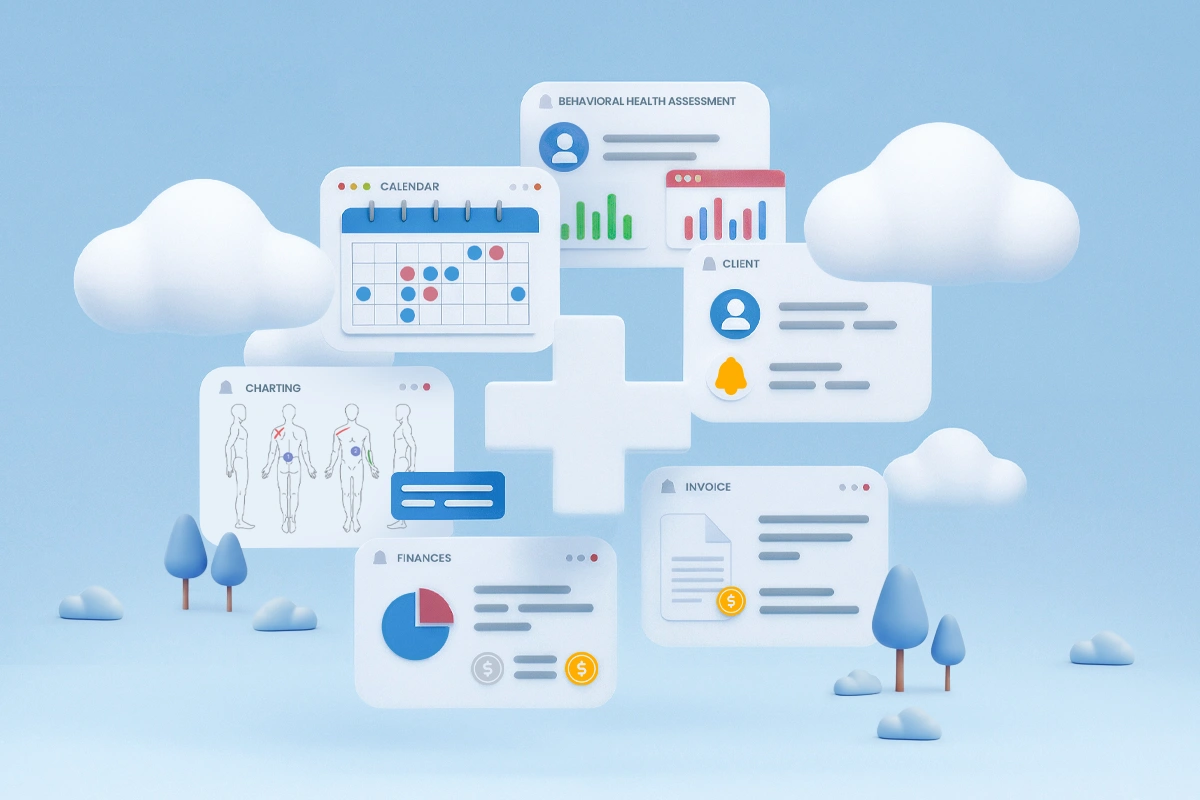
Your data lives in another system — and you need that history to come with you. Client demographics. Appointments. Invoices. Payments. Documents. Chart notes. Years of operational memory.
You reach out to your current vendor and ask for an export.
“Sorry, we can’t provide that.”
And just like that, you’re staring at the exact reason this article exists.
Transferring data between practice management systems isn’t just a technical task. It’s a high-stakes process, often riddled with friction, uncertainty, and hard limits imposed by the software you’re leaving behind. You’ve invested years into your system, and the idea of moving patient records, financial data, and appointment histories isn’t just stressful — it puts the continuity of your practice on the line.
This isn’t about moving files. It’s about preserving the integrity and accessibility of the core of your practice when switching systems is no longer optional.
Understanding the Challenge of Data Migration
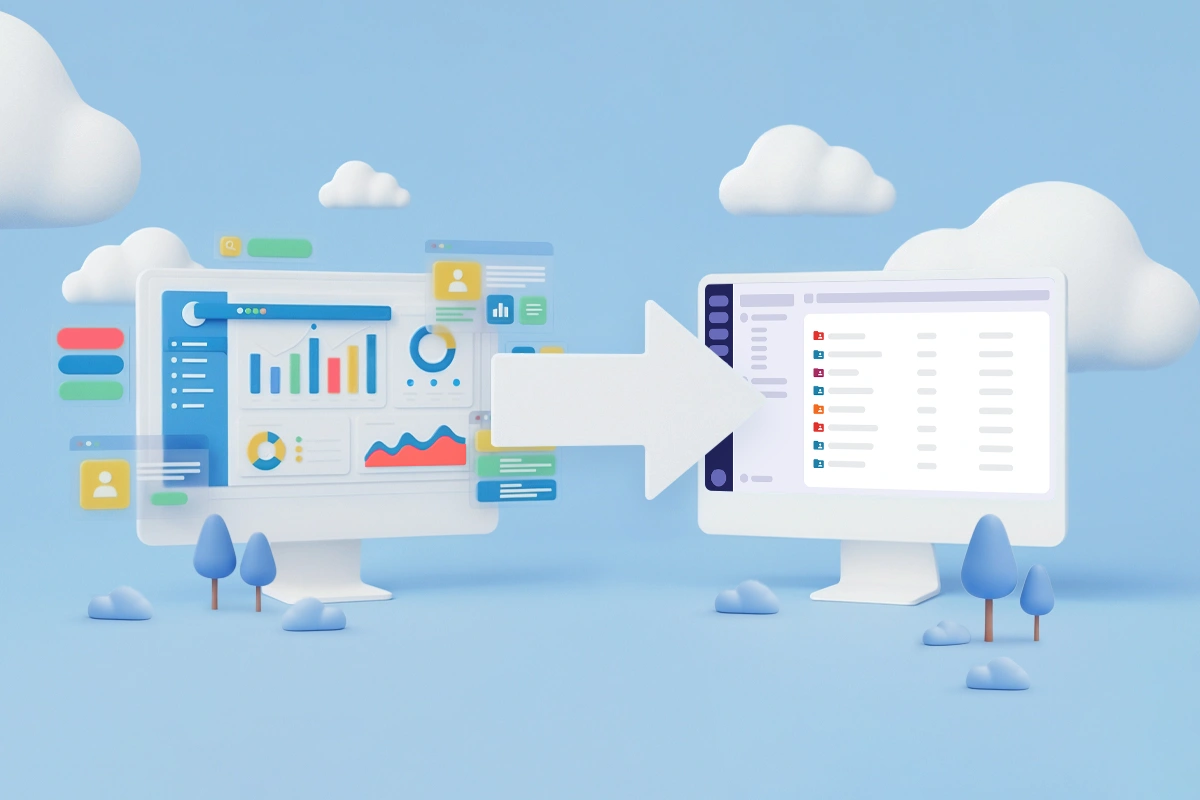
Navigating a data transfer between practice management systems is rarely straightforward. Clinics often underestimate this step, assuming it’s a technical footnote instead of a full operational project.
Practice management software is not a flat spreadsheet. It’s a deeply interconnected ecosystem. Each data point – a patient name, an appointment status, an attached document, a billing line – is stored in a specific structure and linked to others through rules that vary by vendor.
Moving systems isn’t copying a spreadsheet.
It’s rebuilding a working environment inside a different architecture.
Why Data Transfer Is Rarely Simple
Every software vendor designs their system with a different philosophy:
- Different naming conventions
- Different data relationships
- Different assumptions about workflow
What one system treats as a single appointment-linked invoice, another may treat as a standalone financial transaction. Chart notes may be tied to providers, visits, cases — or loosely attached as documents.
This incompatibility is the root cause of migration pain.
And it’s why vendors rarely cooperate beyond surface-level exports.
Why Manual Transfer Is Still the Go-To When Nothing Else Works
If you’re coming from older desktop software, your data often lives in a local database. With enough effort — and a willing new vendor — it can be extracted and reconstructed in a new system.
That effort is rarely trivial.
It often involves days or weeks of experienced analyst or developer time.
With cloud-based systems, the situation is tougher. Vendors almost never provide database access. Even when APIs exist, they’re usually limited, incomplete, or impractical for historical data.
At some point, clinics outgrow their software. Innovation slows. Features lag. The business evolves – and the system doesn’t.
When automated transfer isn’t viable, manual transfer becomes the only dependable option.
This article walks through a practical, step-by-step manual data transfer process – not because it’s elegant, but because it works when all else fails.
Fair warning: it’s not difficult, but it is time-consuming. Done right, though, it gives you control and clarity.
Think of It as Reconstruction – With Real Upsides
Manual transfer isn’t mindless copying. It’s reconstructing your records properly in the new system.
That sounds heavy, but there’s an upside.
Going file by file forces you to touch every detail. You’ll catch errors that have been lurking for years, and fix them on the spot. You’ll spot patterns in how your clinic really runs: no-show trends, billing quirks, service usage. You’ll refine naming for appointment blocks, services, and labels. Years of clutter get cleaned.
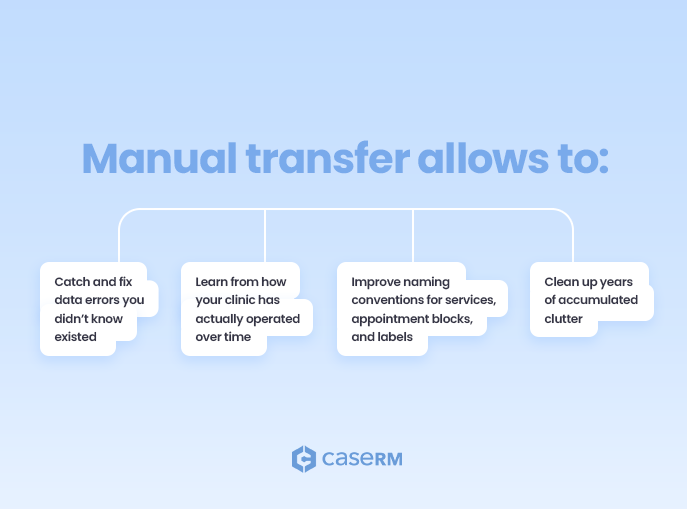
Manual transfer allows you to:
- Catch and fix data errors you didn’t know existed
- Learn from how your clinic has actually operated over time
- Improve naming conventions for services, appointment blocks, and labels
- Clean up years of accumulated clutter
Yes, it takes patience. But it’s also an opportunity.
This process sharpens you as an owner and every team member involved. It deepens everyone’s grasp on operations – from front desk to billing to providers – and makes the whole team more attentive to the details that drive revenue and patient loyalty. You all come out better equipped to run a tighter practice. It’s that classic foundation – clean charts, accurate billing, strong patient relationships – elevated through deliberate review. Modern tools like CaseRM then make maintaining those standards easier than ever.
Set Clear Boundaries First
Before you touch a single client file, define the scope.
Trying to manually recreate five years of appointments will burn out even the most disciplined team. In most cases, you don’t need it.
A realistic approach:
- Appointments: Stick to the last 10-12 months of scheduled, completed, canceled, and no-shows. Older than that rarely justifies the grind unless compliance demands it.
- Invoices and payments: Full detail here – no shortcuts. Accurate balances are non-negotiable.
- Demographics, documents, chart notes: All for active files; essentials for inactive.
Prioritize active clients first. Get recent intakes and anyone likely to return over fast so daily operations don’t stall.
Timing, Team, and Money-Saving Realities
Pick your window wisely:
- Long weekend
- Known slow season
- Short clinic closure if you can manage patient communication
Involve the team early for active files – divide alphabetically, track progress on a shared board. You’ll keep paying the old subscription until actives are transferred (cloud systems cut access cold turkey). Once that’s done, downgrade licenses and let one person wrap inactive files at leisure. Those savings add up fast.
Dual monitors are a game-changer – one for the old system, one for the new (like CaseRM). Sort clients alphabetically in the old system for steady progress.
Pro tip: If you can’t swing a second monitor, use two browsers or split-screen mode. Anything to avoid constant tab-switching – it’ll save hours and cut mistakes.
Patience is part of the toolset. Stock up on coffee.
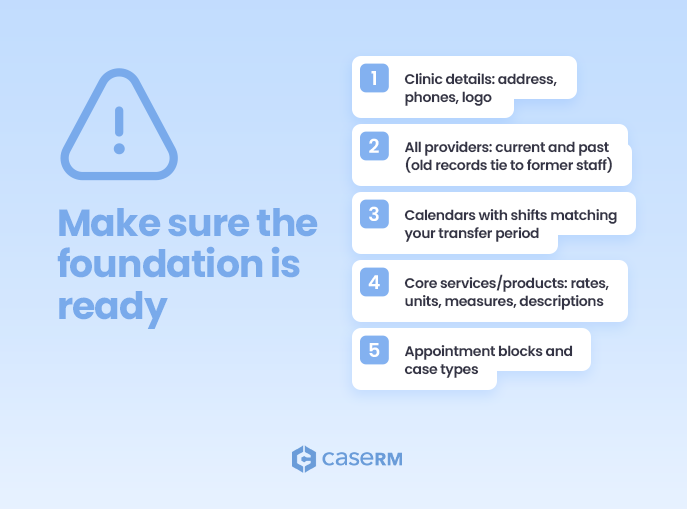
Prepare the New System First
Before transferring any client data, make sure the foundation is ready in the new system:
- Clinic details: address, phones, logo
- All providers: current and past (old records tie to former staff)
- Calendars with shifts matching your transfer period
- Core services/products: rates, units, measures, descriptions
- Appointment blocks and case types
You don’t need everything defined upfront – just enough to move efficiently.
Create a temporary folder on your desktop for documents. Name it clearly, for example:
Universal Transfer
You’ll use this folder repeatedly.
File-by-File: The Only Reliable Rhythm
Once ready, open both systems side by side – preferably on two monitors. One screen for the old system. One for the new.
Sort client files alphabetically and work one complete client at a time. Finish everything before moving on. This minimizes misses and keeps context crystal.
Step-by-Step Client Transfer
1. Create the Client Record
Copy demographics precisely: name, addresses, phones, emails, gender, DOB, referrals, emergencies.
No matching field? Drop it into notes or correspondence.
Preserve chart numbers, case IDs, types – manual entry here pays off later.
2. Documents and Chart Notes
Download all attached documents into your temporary folder.
Chart notes: Export PDFs by provider if possible. Name descriptively, for example: ChartNotes-Universal-BM.pdf (BM = provider initials).
Upload the documents immediately into the new system, then delete them from the temporary folder. Clean as you go.
3. Correspondence and Treatment Plans
Transfer correspondence records next, followed by treatment plans. Keeping this order maintains context and flow.
4. Appointments
Appointments come later – deliberately.
Book all appointments for the client, including canceled and no-shows. First, create them quickly. Then go back and adjust statuses one by one.
This approach is faster and more accurate.
5. Billing and Payments
When recreating invoices:
- Match service fees exactly
- Confirm billing providers per line item
- Verify invoice dates and numbers
- Check subtotals and totals
- Carry over invoice messages when relevant
If your old system used one invoice per appointment (most do), create invoices as you update appointment statuses.
When invoices span multiple services or appointments: Create one consolidated invoice directly in the file. Add all charges at once – cleaner and faster.
Finally, record payments carefully – dates, pay methods, reference numbers (if any), and amounts must match.
Divide and Conquer
If multiple people are helping, split the workload alphabetically. Assign letter ranges and track progress visibly.
Discipline beats speed here.
A Realistic Look At Imperfection
No transfer – automated or manual – is flawless.
Volume, mismatched structures, legacy errors, budget limits – something gives.
Verification alone on automated can balloon costs. Some loss happens.
But moving most of your cleaned, accurate data forward beats abandoning everything to inaccessibility.
Manual at least lets you choose what counts and fix as you go.
And when all else fails, that control makes all the difference.
Moving Forward Stronger
This process demands grit, but it’s proven. It protects what you’ve built, sharpens your whole team, and sets stronger foundations.
Switching to scalable software like CaseRM isn’t just a tech upgrade – it’s freedom to grow while keeping time-tested fundamentals rock-solid.
If you’re facing this now, reach out. We’ve guided plenty through it. Your data belongs with you, and your clinic deserves to move forward unburdened. Let’s make it happen.
You didn’t build your clinic to stay stuck. This is just the bridge to something better.